Introduction
Game Programming with Usagi
A beginner-friendly guide to coding games with Lua
by Brett Chalupa
NOTE: this book is a work in progress!
Hi, my name is Brett Chalupa! I’m the creator of Usagi Engine and primary author of Game Programming with Usagi. This book is a guide for how to jump into making games. It’s project-based and starts with the fundamentals of programming. This book, much like Usagi itself, is simple, accessible, and free.
The advice often given to new game developers is to make a lot of small games. That way the new developer can learn the fundamentals of game development, explore ideas, and figure out what games they enjoy making. The problem though is that most game engines aren’t conducive to making small games quickly. After making small games for over twenty years, I decided to try to solve that problem by creating Usagi Engine, a free and open source game engine that’s specifically focused on making small 2D games and being able to quickly share them. Your code, art assets, audio files, and data are live reloaded as you change them, removing the laborious step of having to constantly re-launch your game after every change to test it. If you want to see if a different color looks better, just edit your sprite, save it, and see it update instantly. I can’t overstate how useful this is.
Usagi games are programmed with Lua, a simple and widely-used language. There are many different game engines and libraries that use Lua, which means the knowledge you gain from learning to make games with Usagi is useful even if you stop using the engine. When you code a game, the engine provides functions, which are named pieces of code that do something like draw a shape on the screen or play a sound effect. Large game engines have hundreds or thousands of functions, requiring you to study complex manuals to find what you need. Usagi, on the other hand, embraces constraints and has a limited number of functions that cover the functionality most games need.
Why Usagi
Usagi is not the everything engine. There’s a lot it doesn’t do. But it excels at being simple, approachable, and fast. When you’re exploring an idea or participating in a game jam, you don’t want to spend your time coding input mapping or where to put save data on Linux computers. You want to focus on making your game fun to play. Usagi provides input mapping, simple ways to check for player input via keyboard and gamepad, easy save data, and a fully-featured Pause menu. Also, with a single command you can export your game for web, Linux, macOS, and Windows.
Here are some of my favorite aspects of Usagi and why it’s enjoyable to use:
- Live reload of code and assets in your running game for rapid development
- Single command cross-platform export
- Unified, simple input checking for gamepads and keyboard
- Built-in Pause menu with settings, including input mapping
Book Overview
This book, Game Programming with Usagi Engine, is written for someone just getting started out making games. If you’ve coded games before, great! You’ll be able to pick up on things even quicker. But if you haven’t, don’t worry. We’ll go through making games step-by-step in guided tutorials. The second half of the book contains recipes that are focused lessons on specific functionality.
There are two sections to the book: Tutorials and Recipes.
The Tutorials are guided, project-based lessons where you’ll make a game from scratch. The complexity of each chapter steadily grows, so if you’re new to game programming, it’s best to start at the beginning and go through each one in order. If you’ve programmed games before, jump around a bit!
The Recipes are deep-dives into specific topics. Sort of like blog posts on various topics related to Usagi Engine. They’re great for learning a specific concept as opposed to guided programming and engine fundamentals.
If you’re looking for Usagi’s reference manual, you’ll want to read through usagiengine.com.
This book is written for humans, by humans! No generative AI was used in the writing of this book.
Getting the Most Out of the Book
Each chapter is broken down into sections, each of which cover a key concept in the game we’ll be building out. The source code snippets are shown in a block of text and then beneath it I explain what that code does. At the end of each section, there’s a link to the full source code at that point in time of the project, that way you can see the full files and where your version might differ.
You’ll be tempted to copy and paste the code from the book, but I strongly recommend you type it out yourself. Part of learning how to code is getting familiar with the process of typing text into your editor and getting use to those ergonomics.
The tutorial chapters may be missing obvious features you think the game might need, like sprites or music or sound effects. I’d encourage you to add those things yourself, change the code, and make it your own game. It might also be that the concept is too complex for that point in the book and that it’ll be covered in a future game.
Most of all, have fun! Game programming can be challenging but it’s quite rewarding. To get to play your game after building some new feature and see it get better and better is an amazing feeling.
If you’re stuck or run into an issue, join the Usagi Engine Discord and ask for help in the #book channel.
Getting Started
There are three things you need to get started with Usagi:
- A computer running Linux, macOS, or Windows
- A text editor for writing code; here are some free, privacy-respecting options:
- Usagi installed; follow the instructions at usagiengine.com
Usagi is interacted with via the command line. You type in commands rather than click buttons in a graphical user interface. On Linux and macOS, the command-line program is called the Terminal. On Windows, the two primary tools are called the Command Prompt and PowerShell (you can use either with Usagi). While the command line can be daunting at first, there are only a few commands you’ll need to know to work with Usagi most of the time.
We’ll cover all of the essential commands and make our first basic game in the upcoming chapters.
Dodge ’Em Up
In this chapter we’ll make a very simple game where you move a square around the screen and dodge circles that fly at you. We’ll cover all of the basics of making a game with Usagi and then package up our game to share it with others.
Initializing a New Game
Now that you’ve got Usagi installed, you’ll have the usagi command available.
Go ahead and open your text editor. Many code editors include a way to open a
terminal/shell within it. If you’re using a text editor that doesn’t, then
launch your terminal or Command Prompt or PowerShell separately. Run
usagi init hello_usagi. This will create a folder called hello_usagi with a
bunch of different files in them. The most important one is main.lua, which is
the primary entrypoint for your game. It’s where you’ll start out coding.
USAGI.md contains the full and complete documentation for Usagi in the
Markdown format. You can open it up and browse it to learn all about what Usagi
can do. It’s a user manual of sorts.
meta/usagi.lua is a file that helps your text editor know what functions and
variables are available from Usagi. You don’t edit this file, it’s read-only and
to help improve your experience writing code. Don’t worry much about this yet!
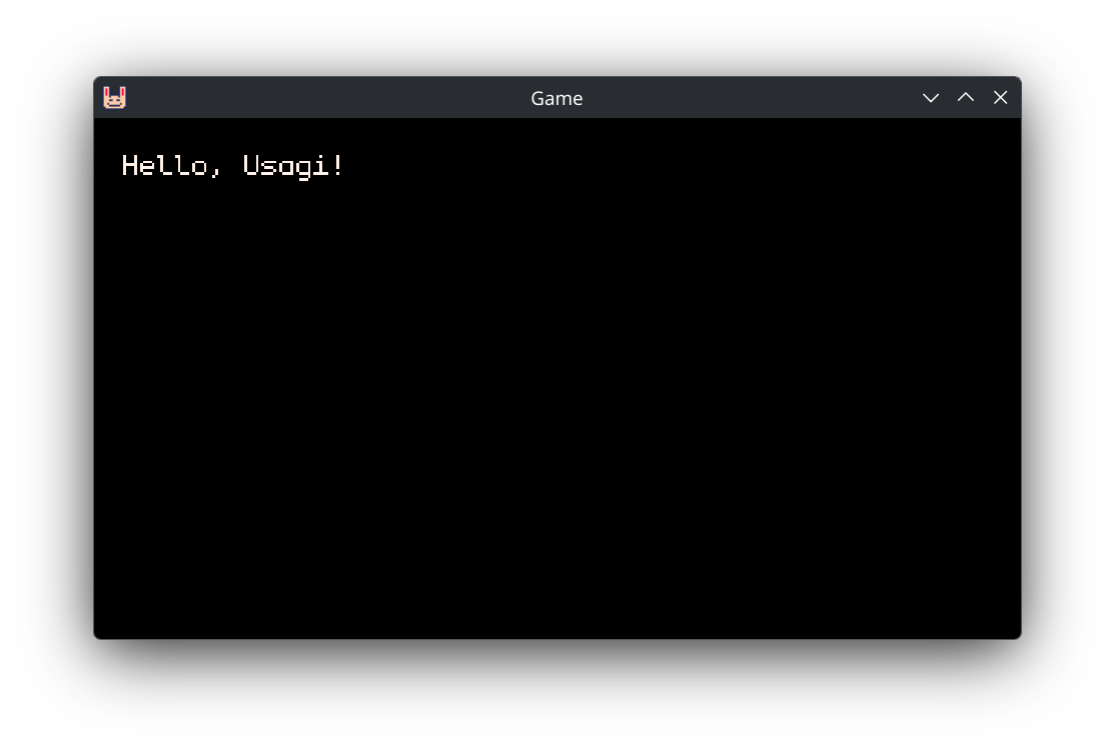
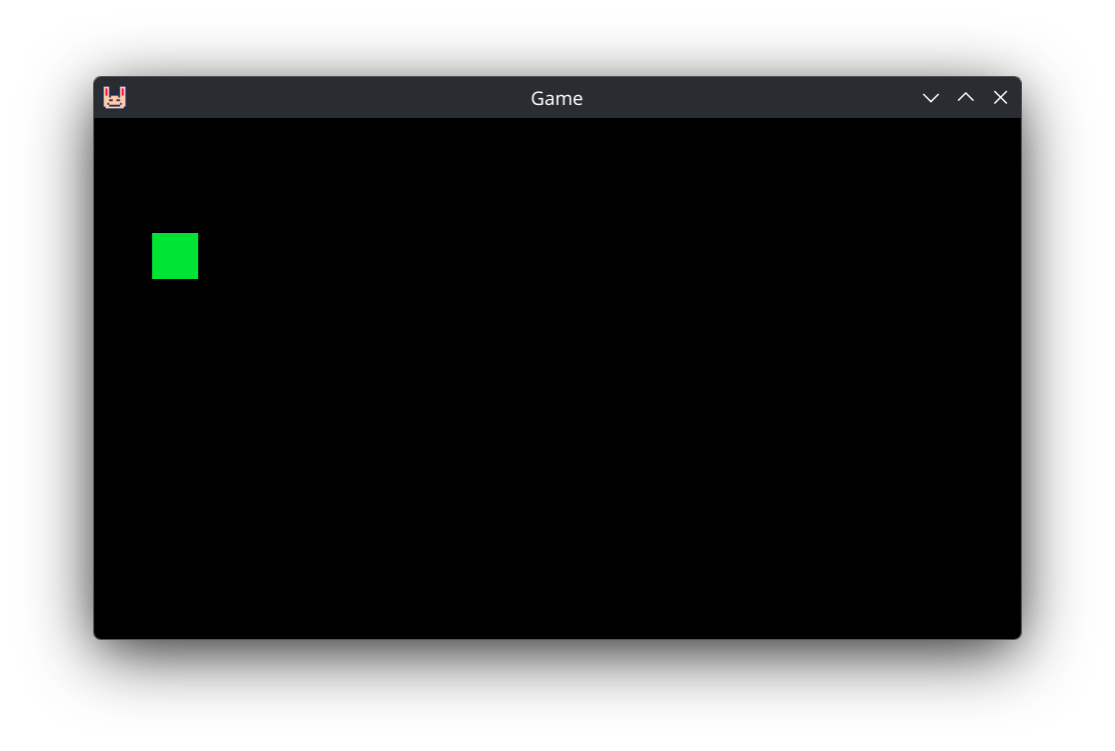
In your terminal, run usagi dev hello_usagi. You’ll see a window pop up that
draws some text on the screen.
Then in your text editor, open main.lua. You’ll see this:
function _config()
  ---@type Usagi.Config
  return { name = "Game", game_id = "com.usagiengine.YOURGAMENAME" }
end

function _init()
  -- Live reload preserves globals across saved edits but resets locals.
  -- Stash mutable game state in a capitalized global like `State` so it
  -- survives reloads; F5 calls _init again to reset.
  State = {}
end

function _update(dt)
end

function _draw(dt)
  gfx.clear(gfx.COLOR_BLACK)
  gfx.text("Hello, Usagi!", 10, 10, gfx.COLOR_WHITE)
end
If this is your first time seeing code, congratulations! This is Lua.
functions are reusable pieces of code that can be called to make whatever code
is contained within the function and end run. We’ll dive more into functions
soon. But let’s walk through the code a bit more first.
_config() is a place where you can set your game’s name and game_id. The
game_id is used for putting your game’s save data in the proper location on
your players’ computers. Don’t worry about this too much yet.
_init() is a function that gets run when your game starts (and when you press
F5 or Ctrl+R). It’s a good place to set up data once.
Then _update(dt) and _draw(dt) are sort of siblings. They get called 60
times per second, over and over again, automatically by Usagi. This is called
the game loop. Games run rapidly so that movement is smooth and the game can
react quickly to player input. Each iteration through the loop is called a
frame, similar to how each image in a movie is a frame. Movies are often 24
frames per second (FPS), whereas games are often 60 FPS. The _update function
is where you check for player input, have entities in your game react to what’s
happening, and simulate the game. There’s nothing there yet, but there will be
soon. The _draw function is where you can show text, draw shapes, or put your
game’s art on the screen.
dt is short for delta-time and it’s passed into _update and _draw
automatically by the game engine. We’ll cover it more in depth in a future
chapter. For now, it’s unused and not something to worry about.
gfx.clear(gfx.COLOR_BLACK) clears the screen so that all that’s shown is a
black rectangle. Each frame we clear the screen so that what was drawn on the
last frame doesn’t reappear. Try changing gfx.COLOR_BLACK to gfx.COLOR_RED.
The background of your game instantly updates from black to red.
The next line gfx.text("Hello, Usagi!", 10, 10, gfx.COLOR_WHITE) is what draws
the message on the screen.
_update and _draw are functions we define ourselves, which Usagi looks for
and calls. gfx.clear and gfx.text are functions that Usagi provides, which
we call. Calling a function makes that code run. So gfx.text draws text to
the screen. It knows which text to draw, where to place it, and what color to
make it by passing in arguments. Arguments are comma-separated values that
correspond to the parameter list of the function. gfx.text expects the text
message to show, the x coordinate, the y coordinate, and the color of the text
as its arguments.
Try changing a few aspects of gfx.text and see what happens. Update the
message, change the 10s, and use a different color.
Next, copy that line of code and paste it below. Draw a different message to the
screen in a different position. And don’t forget to save your main.lua file.
You’re coding! And Usagi is live updating, giving you instant feedback to your changes.
Normally, in most game engines, you’d need to change your code, save it, and run a command to start the game again. With Usagi, you just change it and save it and see your changes.
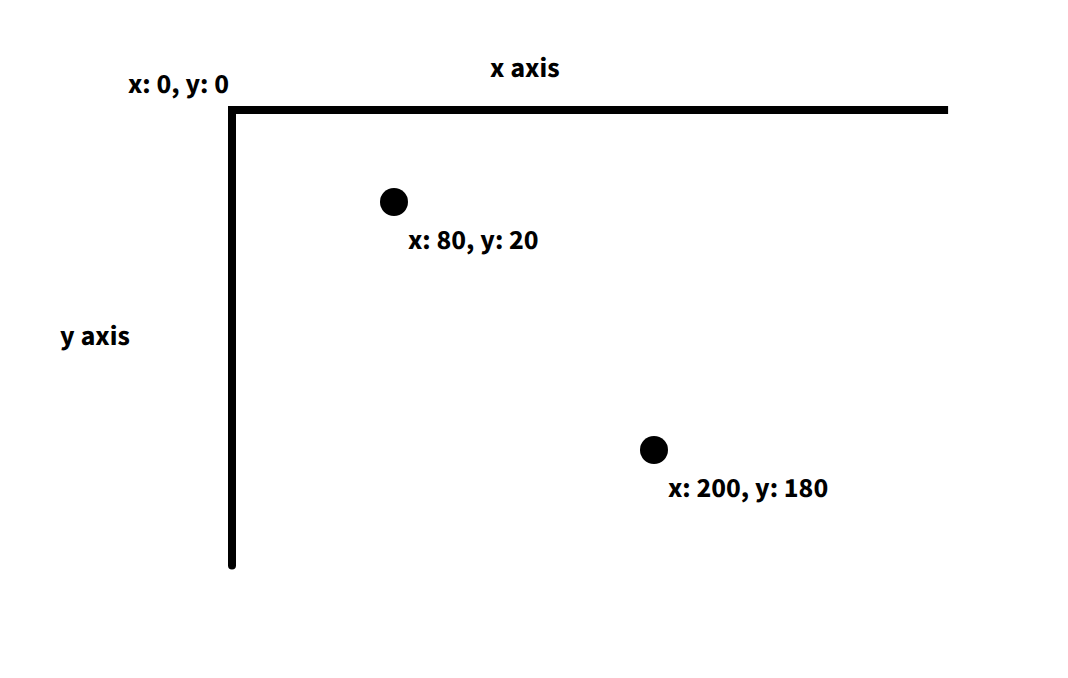
The x and y parameters of the gfx.text function are the pixel coordinates
on our screen of where to place the upper-left corner of the text. The
upper-left corner of our game is the 0 x position and the 0 y position. If you
increase the x value, the text will move to the right. If you increase the y
value, it will move down.
By default, Usagi games are 320 pixels wide and 180 pixels tall. If you set the
x position of your text to 400, it won’t be visible in your game.
Greeting
Let’s write our own function. Functions are a key programming concept that allows us to organize code into a named group that we can easily reuse. Functions can accept data that the code within makes use of. And functions can spit data back based on what the code within does. Rather than just greeting Usagi, let’s make it easy to say hello to any given name.
At the bottom of main.lua, add the following code:
function greet(name)
  return "Hello, " .. name .. "!"
end
Then, in _draw:
gfx.text(greet("Alucard"), 10, 10, gfx.COLOR_WHITE)
Try changing the name. What our updated gfx.text is doing is calling our new
greet function. We pass in the name we want to greet, wrapped in quotations
(note: these are not curly quotes; those are for writing prose, not coding).
When you wrap characters in quotations, this is called a string and it is
not evaluated as code. It’s instead data that we can use in our code. The
return keyword in our function is what our function spits back to wherever
calls it. In our case, it passes the returned value into gfx.text. It draws
"Hello, Alucard!" on the screen. The .. (two periods) is Lua’s syntax for
how to combine strings. It squishes together "Hello, ", our name we pass in,
and "!" into a new string.
Add some other greetings to try out your new function.
Here’s a simple function for adding two numbers and returning the result:
function add(a, b)
  return a + b
end
Functions can accept all sorts of data and return something that’s computed
based on those values. You can see that + is used to calculate the sum of two
values in this example function. While add isn’t something we’ll use in our
game, it’s useful to show what functions can be like. I tend to think of
functions as verbs, actions we want our code to take.
Aside: you have have noticed some lines of text starting with -- in
main.lua. The double dash in Lua creates a comment which is code that’s
not executed and is meant to be used to document how something works. Comments
are useful for future you (or collaborators) to remember what something does.
Throughout the book you’ll see comments like: -- px/s to mean that the number
represents pixels per second for movement speed. I’ll use comments to help
explain some of the code in our games.
View the source code for this section.
Drawing a Square
Let’s draw a square to represent our player. You can delete our greet
function. And then replace the gfx.text function call with this:
gfx.rect_fill(20, 40, 16, 16, gfx.COLOR_GREEN)
This draws a green rectangle at the position of x: 20 and y: 40. The rectangle
is a square, with each side being 16 pixels long. The third parameter is width,
the fourth is height. And the final parameter is the color. Try changing those
values around to see what happens. If you change gfx.rect_fill to gfx.rect,
it’ll draw an outline of the rectangle instead of filling it in.
Usagi makes it easy to draw a few different shape primitives like rectangles, circles, and triangles. We’ll draw circles in an upcoming section to represent enemies.
View the source code for this section.
Player Input
When you changed the x and y parameters in the gfx.rect_fill function call,
the square moved around the screen. That’s all that movement in a game is:
positions changing. Those positions can change due to the passage of time or in
reaction to something else or from player input.
We keep track of data that can change in what’s called a variable. Variables get a name so that we can reference it and change it.
At the top of your main.lua file, add the following:
x = 20
y = 40
This creates and sets the x variable to the number 20 and the y value to
the number 40. The = sign does not mean equals, as in equality. It is the
assignment operator. It sets the variable on the left side to the value on the
right side.
Now update your gfx.rect_fill to use the new x and y variables:
gfx.rect_fill(x, y, 16, 16, gfx.COLOR_GREEN)
Instead of using the hard-coded values we previously had to position the square,
it’s now determined by our new x and y variables. If you change the values
assigned tox and y, it changes where the square is drawn.
In order to move our little green square around, we need to check if the player
has pressed input from their keyboard or gamepad. Usagi provides a simplified
input API that lets you check for input directions and up to three action
buttons. So input.held(input.UP) checks if the Up arrow key or
W key on your keyboard is pressed or if any connected gamepads’ d-pad
up or analog stick up are held down. Usagi provides a baked-in Pause menu with
the ability for players to remap controls. So if they change the up action to
something else you don’t have to change your code. Kind of nice!
We’ll make use of this input.held check in our _update function:
function _update(dt)
  if input.held(input.LEFT) then
    x = x - 4
  end
  if input.held(input.RIGHT) then
    x = x + 4
  end
  if input.held(input.UP) then
    y = y - 4
  end
  if input.held(input.DOWN) then
    y = y + 4
  end
end
If you use the arrow keys, WASD, or your gamepad, you can move the green square
around the screen. How this works is that 60 times per second, our game checks
if the direction inputs are held down. If they are, we use = to reassign the
variable value to the previous value plus 4 pixels. So if the right key is held
down, each loop of our game adds 4 pixels to the x variable. This causes our
square to fly across the screen to the right.
The if ... then code means: only run the code between this check and the
corresponding end if what’s between the if and the then is true. In
programming, true and false are known as boolean values and are used for
logic checks. If the left input is held down, then decrease the x position by
4 pixels. One of the nice parts about the Lua programming language is how
natural the code reads, making it easier to understand because it’s a lot like
how English is spoken.
Boolean checks are used so frequently when programming games. If the player is dead, then show game over. If the timer is up, then play a sound effect. We’ll be adding many more throughout this chapter and the entire book.
View the source code for this section.
Spawning Enemy Circles
Having a moveable player character is a natural first step, but let’s give the player something to do. We’re going to make circles fly at the player from the right side of the screen, spawning them at random positions and giving them random speeds so that there’s a bit of challenge.
At the top of main.lua, below our x and y variable assignment, add this:
enemies = {}
This assigns {} to the enemies variable. But what do those squigly brackets
mean? They’re the symbols that represent the beginning and end of a table
in Lua. So far we’ve worked with strings, which are characters within
"hello123". We’ve used whole integer numbers to represent the player’s
position. The third absolutely foundational type of data in Lua programs are
tables. They’re used to store collections of other data.
Aside: If you’ve programmed in other languages, Lua’s tables are a single data structure used for arrays and for JavaScript-like objects or Ruby-like hashes.
The data within a table can be an ordered list. Something like this:
even_nums = { 2, 4, 6, 8, 10 }
classmates = { "Simon", "Alucard", "Richter" }
I’ll call these types of tables array tables or just arrays throughout
the book. They’re also sometimes referred to as numeric tables.Each entry is
separated by a comma (,).
Or you can assign values to a specific key:
monster = {
  hp = 44,
  str = 12,
  def = 5
}
The monster table has the key hp (which is technically the string "hp")
assigned the value of 44, using a very similar syntax to variable assignment.
Each key must have an associated value. And each key value pair in the table is
separated by a comma (,), just like the array style table.
These types of tables are sometimes called associative tables. Throughout the book they’ll often just be referred to as tables.
Array tables can contain tables as entries:
monsters = { { name = "Vampire", hp = 31 }, { name = "Golem", hp = 44 } }
And associative tables can have tables assigned to their keys:
player = {
  items = { "Potion", "Wing" }
  hp = 44,
}
Tables are flexible in Lua and quite powerful. I can’t think of a game I’ve made that doesn’t use them, as they’re where you store collections of data. A game is essentially a bunch of different collections of data that respond to player input or time or some other system in the game.
But back to our enemies = {} line of code. That creates an empty table with
nothing in it. We’ll treat this as an array table of data that contains our
enemy positions, spawning new ones at a set interval.
Right below that line, create these two new variables that we’ll use for spawn timing:
enemy_spawn_timer = 0
enemy_spawn_delay = 2 -- secs
In our _update function, below where we handle player input for movement, we
need to countdown our enemy_spawn_timer every frame of our game and add an
enemy to our enemies array if the timer is less than or equal to 0:
  enemy_spawn_timer = enemy_spawn_timer - dt
  if enemy_spawn_timer <= 0 then
    table.insert(enemies, { x = usagi.GAME_W, y = 40 })
    enemy_spawn_timer = enemy_spawn_delay
  end
Just like we do with the x and y position for player movement, we update our
enemy_spawn_timer but subtracting the dt (delta time, which is how long has
passed between frames in seconds) from its current value. Then we check if it’s
<= (less than or equal to) 0. If it is, then we call the table.insert
function, which Lua provides. The first argument is the array table we want to
insert an entry into. In our case, it’s the enemies array. table.insert adds
a new entry at the end of the table. The second argument is the data we want to
append. We pass an associative table with an x position and a y position,
which represents where the enemy will spawn at. usagi.GAME_W is the width of
the game, so the far right of the window. And 40 is just a little bit down
from the top of the screen.
Right after the enemy is spawned, we reset the enemy_spawn_timer to the
enemy_spawn_delay, beginning the countdown to spawn another enemy again. The
game continues to loop, running _update 60 times per second, decreasing
enemy_spawn_timer each time.
Right below that new code we added in _update, we want to make our enemies
move across the screen from right to left. In order to do this, we need to walk
through each enemy in our enemies array, one by one, and update its x
position by subtracting a value from it. Walking through an array item by item
is done with a for loop. Here’s the code:
  for i = 1, #enemies do
    local enemy = enemies[i]
    enemy.x -= 2
  end
Let’s break it down line by line:
for i = 1, #enemies do
The first line starts the loop. for is the keyword to begin that style of
loop. i = 1 assigns a variable at the start of the loop the value of 1. The
next argument is the ending value of the loop. In our case, it’s the total
number of enemies in that array. In Lua, you get the number of items in an
array with #. The for loop increments i by 1 until it hits the upper
value. And for each iteration of the loop, it calls the code contained between
the do and the end. In our case, that’s:
local enemy = enemies[i]
enemy.x -= 2
We assign a local variable enemy. local is a keyword in Lua that says:
only make this variable exist within the scope it was created in. Don’t worry
too much about local yet, we’ll cover that in the future. The value we assign
to enemy is enemies[i]. For array tables in Lua, you access the values in
the list by its position. The first item has a position of 1, the 2nd has a
position of 2, and so on. We call our position variable i, which is short
for index. You could name it pos, short for position if you want. So that
line that assigns local enemy grabs the current enemy in the array and assigns
it to a variable so we can easily change it. Which we do on the line below by
subtracting 2 pixels from that enemy’s x position. This will make the enemy
move from left to right off the screen.
In an associative Lua table with keys and values, you can access and modify the
value of a given key using the dot syntax: enemy.x refers to the value
assigned to the x key in that table. You could also access it with
enemy["x"], but the dot syntax is more concise and common. Using the square
brackets is just like how we access array entries, but rather than use the
number position, we use the string key.
If games are collections of data, which we store in tables, then loops are how we enumerate through our list and check or change that data.
All that’s left for this section is to actually draw our enemies. In our _draw
function, after we clear the screen and draw our player, we need to loop through
our enemies yet again and draw them:
  for i = 1, #enemies do
    local enemy = enemies[i]
    gfx.circ_fill(enemy.x, enemy.y, 8, gfx.COLOR_RED)
  end
We use the same style of for loop. But rather than update the enemy’s
position, we draw a filled red cicle at the enemy’s position. The 8 is the
radius of the circle in pixels. Note: when we draw our player, the origin is
the upper left of the green rectangle. But when drawing a circle, the x and
y describe the circle’s center point. This can be slightly confusing but it’s
worth knowing upfront as it’ll influence the code we write in the rest of the
chapter.
Save your main.lua and you’ll see red circles fly across the screen:
Kind of neat to see something moving on its own! But we’re missing a few things:
handling when a circle hits the player and spawning our enemies at different y
positions to make it more challenging. Also, it’d be more interesting if the
speed of each circle was random to add some variation and keep the player on
their toes.
View the source code for this section.
Random Y and Speed
To make our game have a bit of randomness, we’ll make use of Lua’s math.random
function. It allows us to pass in a lower and upper value, and it returns a
number in that range (inclusive of the lower and upper values). So
math.random(1, 4) randomly returns a whole number between 1 and 4, including 1
and 4. The possible values are 1, 2, 3, and 4.
In _update change the code where we spawn our enemies to this:
  if enemy_spawn_timer <= 0 then
    local padding = 10
    table.insert(
      enemies,
      {
        x = usagi.GAME_W + padding,
        y = math.random(padding, usagi.GAME_H - padding),
        spd = math.random(2, 4) -- pixels per frame
      }
    )
    enemy_spawn_timer = enemy_spawn_delay
  end
Rather than hardcoding the y value, we calculate a number between 10 and the
game’s height minus 10 pixels. The 10 pixel padding helps keep the enemies
contained within the field. Then we set the spd of each enemy to a random
value between 2 and 4. The code is broken down into multiple lines to make it
easier to read, since really long lines of code are difficult to understand and
edit.
Then, below our spawning check, make it so that the enemies update loop uses
the enemy.spd instead of the hardcoded value.
  for i = 1, #enemies do
    local enemy = enemies[i]
    enemy.x -= enemy.spd
  end
Our enemies are spawning all over the screen, with some moving faster than
others. But they’re a bit few and far between to actually pose any threat. At
the top of main.lua, decrease the enemy_spawn_delay value:
enemy_spawn_delay = 0.5 -- secs
Spawning an enemy every half second is feeling pretty good to me! But you’re welcome to change it and tune it to what feels good. That’s a key part of making games: adjusting speeds and sizes and stats to make the game feel good.
View the source code for this section.
Recycling Enemies
There’s a glaring issue in our game though. Something that’s not even visible!
Where do those little red circles that fly off of the screen go?!
Are they just scrolling forever onward left??? Until the sun explodes??
Well… let’s find out! At the end of _draw, let’s render some text that shows
us how many enemies there are in our enemies array:
gfx.text("Enemies: " .. #enemies, 10, 10, gfx.COLOR_WHITE)
The number of enemies keeps increasing. Which means each frame we’re looping through dozens or hundreds or thousands of enemies. But they’re not even visible nor a threat to the player. Also, if you know a little bit about computers work, you might be thinking, if there were millions of those little buddies, couldn’t my computer run out of memory? What would happen then? It wouldn’t be good, that’s for sure!
In our simple game, the risk here is pretty low. But we should clean up these enemies and recycle them. That way we don’t waste CPU cycles and memory. And it’s a good learning opportunity!
The way we’ll clean up our enemies that have disappeared in the void is to walk
through our enemies table backward, check if the x position of that enemy is
below a certain threshold, and if it is, then we’ll remove that enemy from the
table. Add this code below the for loop where we update the x position of each
enemy:
  for i = #enemies, 1, -1 do
    if enemies[i].x < -10 then
      table.remove(enemies, i)
    end
  end
This is new, second loop through our enemies. But rather than going from the
beginning to the end, we go from the end to the beginning. The for loop also
supports setting the value at which to increment or decrement by. In our new
loop, it says: start i at the length of our enemies table, looping until i
is 1, adding -1 to i after each iteration.
You’ll notice that the length of enemies that’s drawn on the screen now
decreases when enemies fly off the screen and increases when new ones spawn. But
it no longer grows infinitely!
Our code that loops through from beginning to end, for i = 1, #enemies do,
could also be written like:
for i = 1, #enemies, 1 do
But that’d be verbose since incrementing by 1 is the default behavior.
Within our reverse loop, we check if the enemy at i’s x position is less
than -10. -10 is just a little buffer for once the enemy is definitely off the
screen and no longer visible. If the enemy is off the screen, we call
table.remove with our enemies table and the index we want to remove the
value at (which is i, the current iteration of the loop).
We have to loop through in reverse order to be sure that we don’t shift the items in the array, leading to items being skipped in the loop. Let’s say we have this code:
nums = {1, 2, 3}
for i = 1, #nums do
  if nums[i] == 2 then
    nums.remove(nums, i)
  end
end
We’d actually run into a serious problem. When we remove the first item of the
array, the remaining items shift forward in the table. In the first iteration of
the loop, the first value in the nums array does not equal 1 (== is a
boolean check to see if two values are equivalent, returning true if they
are). On the second loop, the value in our array does equal 2, which means we
remove the item at position (i) 2 in our array. So nums becomes
{ 1, 3 }. The third iteration of the loop has i set to 3, since it
incremented by 1. nums[3] doesn’t exist anymore since we shifted 3 into
the 2nd position! We’ve effectively skipped over checking the number 3 in our
contrived (and possibly slightly confusing) example. In our game code, if we
skipped over checking some enemies, that could lead to buggy behavior where we
miss checking the position of certain enemies.
But if we loop through our nums in reverse order, it’s safe to remove items
becaus later entries in the array have already been checked and it’s okay if
their position changes. Let’s walk through our simple example but in reverse:
nums = {1, 2, 3}
for i = #nums, 1, -1 do
  if nums[i] == 2 then
    nums.remove(nums, i)
  end
end
i is 3 in the first iteration of the loop. nums doesn’t change. Then on
the 2nd iteration of the loop, i is 2, which is equal to 2, so our code to
remove the 2nd entry in our nums array runs. nums now becomes { 1, 3 }.
But because we’re decrementing i, which is now 1 on the 3rd loop, it checks
nums[1] which is the expected value 1. Even though the position of 3
changed, it doesn’t matter since i values will be at the beginning of the
array and their positions haven’t shifted.
If numbers are swimming around in your head and you’re feeling dizzy and now hate programming, don’t sweat it! Just know that when we’re removing items from an array, we have to loop through them in reverse order to prevent introducing bugs and potentially skipping over entries.
View the source code for this section.
Hit Detection
We’re on the cusp of having something that’s pretty fun to play! We need to make it so that when our player is hit by a circle, the game ends. We’ll check to see if the player’s square overlaps with any of the circles. If it does, then it’s game over! When it’s game over, we’ll display a message and let the player play again.
Add a variable at the top of main.lua by our other variables that tracks
whether or not we’ve lost:
game_over = false
You can assign true or false to variables, which are the boolean values that
we are using in our various if checks. When the game starts, the game is not
over yet, so we initialize it to false.
Then in _update, where we loop through the enemies and update their position
(not the loop where we check if they’re off the screen), we need to check if
each enemy overlaps with the player:
  for i = 1, #enemies do
    local enemy = enemies[i]
    enemy.x -= enemy.spd

    if util.circ_rect_overlap(
          { x = enemy.x, y = enemy.y, r = 8 },
          { x = x, y = y, w = 16, h = 16 }
        ) then
      game_over = true
    end
  end
util.circ_rect_overlap is a function Usagi provides that checks if any portion
of a circle overlaps with a rectangle. The first argument is a table
representing the circle, which is the enemy’s position and its radius. The
second is the player’s rectangle, which is its position and its size.
So if the enemy circle overlaps the player rectangle, then we set the
game_over variable to true. Which we’ll then use to render a game over
message and also check if the player wants to restart the game.
At the end of our _update function, below where we loop through each enemy in
reverse to check if they’re off the screen, add this code that checks if
game_over is true and if the player has pressed BTN1. (More on BTN1 in a
moment.) If both of those are true (the and keyword is used to combine checks
where both have to be true, meaning this code won’t run if game_over is false
but BTN is pressed), then we reset our game data to start the playing the game
again.
  if game_over and input.pressed(input.BTN1) then
    -- reset our game data
    x = 20
    y = 60
    enemies = {}
    enemy_spawn_timer = 0
    game_over = false
  end
input.BTN1 is part of Usagi’s universal, simple input API. We checked for
directional inputs before. But now we need to check an action button. The simple
input API allows you to check keyboard and gamepad input, giving players
flexibility in their input methods. Rather than you having to check if a
specific key on the keyboard or button on the gamepad was pressed, you can use
input.pressed(input.BTN1) to check if the key/button bound to that action was
pressed once. By default BTN1 is mapped to Z on the keyboard and
the A button on gamepads. Usagi has support for up to 3 buttons.
So if the game is over and BTN1 is pressed, restart the game. Nice!
Now that we properly set game_over, we can check in our _draw function for
its value and update what we render accordingly.
Let’s only draw the player if it’s not game over:
  if not game_over then
    -- draw the player
    gfx.rect_fill(x, y, 16, 16, gfx.COLOR_GREEN)
  end
if not game_over then does exactly what it reads like: if game_over is
false, then run the code between the then and the end.
At the bottom of _draw, if it is game over, let the player know with some
helpful text:
  if game_over then
    gfx.text("GAME OVER", 10, 10, gfx.COLOR_WHITE)
    gfx.text("Press " .. input.mapping_for(input.BTN1) .. " to restart",
      10, 30, gfx.COLOR_WHITE)
  end
input.mapping_for is a useful function Usagi provides that returns whatever
key or gamepad button is bound to that input item. It auto detects if the last
input source was a keyboard or gamepad and updates accordingly.
We’ve got a little game that we can play now! It’s got a lose condition and a little bit of challenge.
View the source code for this section.
Play Time
But there’s one aspect missing: we don’t know how long we survived for. Let’s keep track of how long the player has survived and display that in our game.
We need a new variable to keep track of play_time at the top of main.lua:
play_time = 0
In _update where we reset the game data, reset play_time to 0:
  if game_over and input.pressed(input.BTN1) then
    -- reset our game data
    x = 20
    y = 60
    enemies = {}
    enemy_spawn_timer = 0
    game_over = false
    play_time = 0
  end
Right below that restart check, check if it’s not game over and add the dt to
play_time:
  if not game_over then
    play_time = play_time + dt
  end
dt is a decimal value, since it’s usually about 0a.016. Each frame we add that
to play_time to keep track of the time that’s passed so long as the player
hasn’t been hit. Then at the bottom of _draw, drop the decimal places from
play_time and render the whole number of seconds the player has survived:
gfx.text(math.floor(play_time) .. "s", 280, 10, gfx.COLOR_WHITE)
View the source code for this section.
Sharing Our Game
You did it! You made a game! It’s got a goal: survive as long as possible. There’s a bit of challenge to it. And you can play it over again when you game over. This simple little game has the core concepts virtually all games have: a gameplay loop, code that runs every frame, data, player input.
Now all that’s left is to share our game. Usagi makes that easy. Run:
usagi export in your project folder from the terminal. This will create an
export folder that has your game build for Web, Windows, macOS, Linux, and
even Raspberry Pi devices. You can share your game with your family and friends
or upload it online for others to play.
A popular place to share your game online is itch.io. It lets
you publish your game to a page that you can share privately or publicly,
totally for free. Sign up for an account and then from the Dashboard, click
“Create new project”. Add a title for your game, like “Dodge ’Em Up” or whatever
you want to call your game. Set Kind of project in the new project form to
“HTML”. Then in the Uploads section click “Upload files”. Navigate to your
Usagi project, open the new exports folder, and select all of the versions of
your game. They’ll upload to itch. It’ll upload each one, and you can select the
operating system accordingly. For game-web.zip, check the “This file will be
played in the browser” box so the web game loads properly on itch. At the bottom
fo the form, click “Save & view page”. You’ll have a draft page you can view and
test your game in. And you can change the visibilty to Public if you want to
share it with others.
📺 Watch a video of this process.
Bonus Credits
Nice job following along and making your first Usagi game! It’s a bit simplistic, so here are some ideas for how you could expand upon it to make it more fun:
- We have a lot of duplicated numbers throughout our code, like the radius of the enemy circles and the player’s size. Put those in variables and replace the magic numbers with the new variables you created. This makes the code easier to understand and easier to change since the variable names are descriptive and the value is consolidated in once place.
- Keep track of the player’s high score in a variable. When they game over,
compare the new time to the high score and update it if the new one is longer.
Display the high score in
_drawfunction. - Make enemies fly in from different sides, not just the right side.
- Add multiple enemy types that have different sizes and colors, to make the game more challenging.
- Make more enemies spawn or make them faster as time goes, making the game harder the longer the player survives.
- Usagi has some functions to make it easy to add screen effects, like screen
shake and flash. Try adding
effect.screen_shake(0.2, 4)when the player gets hit andgame_overis set totrueto add a little bit of juice to your game. - There’s a lot our game doesn’t do, like playing sound effects or music. Check out the Usagi documentation and explore what else is possible to add in your game. Make it your own!
Shoot ’Em Up
Shoot ’em ups (a.k.a. shmups, STGs, shooters) are games where you pilot a ship and fire bullets. Your goal is simple: survive and defeat enemies. But with that simple goal, there’s challenge, fun, and depth. Many shmups have scoring systems, adding even more replayability to game. Shmups go back decades. I’m talking about games like Galaga, R-Type, Dodonpachi. Intense action games with an arcade lineage. They also happen to be my favorite type of game to play and make.
TODO: screenshot showing an example of the game type or what we’ll make
Shmups are great for learning how to make games because you can build something fun and challenging and begin iterating on it quickly, experimenting with systems and enemy behaviors. The core of the game is having a playable ship that can fire bullets, enemies that spawn and attack, and some sort of win state. These simple basics can be expanded upon endlessly.
For our shoot ’em up, we’re going to make a game where enemies spawn in waves. You have to defeat them (or they have to exit the screen) before the next wave spawns. You’ll have 60 seconds survive, defeat as many enemies as possible, and get the high score. Some enemies will dive down the screen, others will fire bullets at the player. By the end of this chapter, we’ll have made a shmup that you can tune, expand, and make your own. We’ll also dive deep on collision detection and finding a balance between challenging gameplay and enjoyable dodging.
This chapter builds upon the foundations from the Dodge ’Em Up chapter, so if you’re new to programming and Usagi Engine, read that first.
Moveable Player
Ensure you have Usagi Engine installed. Run
usagi init shmup to create your new project. Open your new project folder in
your code editor. Then run usagi dev in the folder to start up your game in
dev mode.
We’ll start by drawing a square to represent our player that can be moved around the screen. In the Dodge ’Em Up chapter, you may have noticed that if you press Up and Right (or any diagonal combination), the player moved faster than they did when moving in the cardinal directions. In a lot of shmups, this isn’t ideal, as you want movement to be precise. In order to make the distanced traveled in all 8 possible directions the same, we need to normalize our input.
Here’s the starting place for our game in main.lua:
local player_size = 16
local player_speed = 180 -- px/s

function _config()
  ---@type Usagi.Config
  return {
    name = "Shmup",
    game_id = "com.brettmakesgames.shmuptutorial",
    game_width = 320,
    game_height = 320,
  }
end

function _init()
  State = {
    player = {
      x = usagi.GAME_W / 2 - player_size / 2,
      y = usagi.GAME_H - 60
    }
  }
end

function _update(dt)
  local input_delta = { x = 0, y = 0 }
  if input.held(input.UP) then
    input_delta.y -= 1
  end
  if input.held(input.DOWN) then
    input_delta.y += 1
  end
  if input.held(input.LEFT) then
    input_delta.x -= 1
  end
  if input.held(input.RIGHT) then
    input_delta.x += 1
  end
  local normalized_input = util.vec_normalize(input_delta)
  State.player.x += normalized_input.x * player_speed * dt
  State.player.y += normalized_input.y * player_speed * dt
  State.player.x = util.clamp(State.player.x, 0, usagi.GAME_W - player_size)
  State.player.y = util.clamp(State.player.y, 0, usagi.GAME_H - player_size)
end

function _draw(dt)
  gfx.clear(gfx.COLOR_WHITE)
  gfx.rect_fill(
    State.player.x, State.player.y,
    player_size, player_size, gfx.COLOR_BLACK
  )
end
We set player_size and player_speed variables. The local keyword is new
and worth explaining a bit, as it impacts how Usagi’s live reload works and
what’s accessible in your game’s source code as it expands into multiple files.
By default, when you create a variable in Lua, like x = 10, it is a global
variable. That means that any part of your game’s source code can read its value
and even change it. This is powerful but risky. It’s easy to accidentally
sometimes create global variables and accidentally change them when you didn’t
intend to. When Usagi live reloads your games code, it does not update
global variables unless you press Ctrl + R or F5. On the
other hand, the local keyword says: only within this file or function or chunk
of code is this variable accessible. Usagi does re-evaluate local
variables when you change them. For our player_size and player_speed, if you
change them and save main.lua, the engine will re-evaluate your new values.
This is helpful for tuning speed and trying out different values to see what
feels right.
In our _config() function, we set the name of our game and the game_id.
Change the game_id to com.usagiengine.YOURUSERNAME.shmup, where you actually
put in your username/handle. This should be a unique identifier for your game,
which is used for the save data location on people’s computers. The game_width
and game_height tell Usagi Engine to make our game field those specified
sizes. You can change these values to whatever you want, but for our game, a
square field feels good since you don’t have to worry about covering a wide
distance to reach enemies on the other side of the screen. Enemies will fly in
from the top, which will make our shoot ’em up a vertically-oriented game.
In _init(), we create a global State table with our player’s position.
State is a common way in Usagi games to have a global to contain all of the
game’s data, allowing for easy access. Since State is global, it doesn’t
change when the game is live reloaded, which is what we want. This lets our
player stay in the same position when our game code changes. You could change
player_speed and instantly test that new value without the entire game
reseting. The math in the player x and y value centers our player
horizontally and places the y value 60 pixels up from the bottom of the game.
The values of usagi.GAME_W and usagi.GAME_H correspond to what we set in
_config. Yoou could just hardcode 320 instead for each of them, but if you
decide to change the width or height of your game, you’ll be left searching for
and updating all of those old values. When possible, it’s best to not use
magic numbers for values in our game.
The _update function contains our player movement, similar to Dodge ’Em Up.
Except rather than changing the player’s x and y value in the if checks,
we update a variable called input_delta. input_delta is a Lua table that
lets us set whether or not there was movement on a given axis. By using 1,
we’re creating what’s known as a unit vector, which makes normalizing it on the
diagonals easier. Then we call util.vec_normalize(input_delta) after our input
checks. util is a collection of functions that Usagi provides to make common
operations easier. That function returns a new table with the values normalized.
When you press right and down, rather than x and y both being 1, the value
of both are: 0.7071.... This makes it so that the distance traveled is the
same in all directions. We then take that normalized value and multiply it by
the player_speed and dt (dt is delta time, the amount of time since our
last _update call). This gives us the new position for the State.player.
After that, we prevent the player from moving off the screen by calling
util.clamp on the x and y position of the player. util.clamp takes three
values: the value you want to limit, the lower limit, and the upper limit. If
the value is below the lower limit, then the lower limit is returned. If the
value is higher than the upper limit, the upper limit is return. Otherwise, the
value is returned.
Finally, in _draw, we clear the screen so we have a white background. And then
draw a black rectangle at the State.player’s position.
This was a whole lot for the first section of our chapter, but we’ve got a good
starting point to build upon. Tweak the player_speed and player_size to see
what happens.
View the source code for this section.
Firing Bullets
Let’s make our player’s ship fire bullets upward. We’ll keep track of them in a Lua table. Each frame we’ll move them upward and if they scroll off the screen, we’ll remove them from the table.
Start by setting up some local variables at the top of main.lua:
local fire_delay = 0.1   -- s
local fire_timer = 0
local bullet_speed = 420 -- px/s
local player_bullet_w = 4
local player_bullet_h = 10
We’ll use all of these variables for firing and drawing bullets.
In our State table, add a new empty table for bullets:
  State = {
    player = {
      x = usagi.GAME_W / 2 - player_size / 2,
      y = usagi.GAME_H - 60,
      bullets = {}
    }
  }
We’ll add new bullets into that table when they’re fired and loop through it for updating the bullets and draw them on the screen.
In our _update function, below where we handle player movement, add the
following code:
  fire_timer -= dt

  if fire_timer <= 0 and input.held(input.BTN1) then
    local bul_y = State.player.y - player_bullet_h
    -- fire 3 bullets
    table.insert(State.player.bullets,
      { x = State.player.x - player_bullet_w, y = bul_y })
    table.insert(State.player.bullets,
      { x = State.player.x + player_size / 2 - player_bullet_w / 2, y = bul_y })
    table.insert(State.player.bullets,
      { x = State.player.x + player_size, y = bul_y })
    fire_timer = fire_delay
  end

  for i = #State.player.bullets, 1, -1 do
    local bullet = State.player.bullets[i]
    -- move the bullet upward
    bullet.y -= bullet_speed * dt

    -- remove bullets that have flown off the top of the screen
    if bullet.y < -player_bullet_h then
      table.remove(State.player.bullets, i)
    end
  end
In each frame, we subtract the dt from fire_timer to count it down. Then, if
the fire_timer is less than or equal to 0 and the player is pressing BTN1
(keyboard: Z or gamepad: A by default), then fire three bullets. The firing of a
bullet uses the Lua function table.insert, which appends a new bullet at the
x and y position to State.player.bullets table. Then, finally, we reset
the fire_timer to fire_delay, which restarts the countdown, adding a slight
gap between each time a set of bullets get fired.
The for i = #State.player.bullets, 1, -1 do line of code is a loop that goes
through the player’s bullets in reverse, moving them up the screen by
subtracting the bullet_speed * dt from each bullet’s y position. If the
bullet is so far up the screen that’s it’s no longer visible (the negative
height of the bullet), then we need to remove it from the player’s bullets
table. We have to loop through the bullets in reverse order so that if we do
remove a bullet, those in the array from that position onward will properly
shift into position. If you didn’t reverse the order of looping through the
bullets, if you removed the first bullet, they remaining would shift forward,
causing the next iteration of the loop to skip one and potentially access an
index that no longer exists.
Now we need to draw our bullets by looping through them at the bottom of
_draw() and drawing a light gray rectangle:
  for _, bullet in ipairs(State.player.bullets) do
    gfx.rect_fill(bullet.x, bullet.y,
      player_bullet_w, player_bullet_h, gfx.COLOR_LIGHT_GRAY)
  end
The for _, bullet in ipairs(State.player.bullets) do line loops through each
of the bullets in State.player.bullets. The code between the for ... do and
its end is called for each bullet in that list. ipairs returns two values,
the index of the item in the list and the actual item in the list. We set the
index variable to _, meaning we don’t use it.
In less than 100 lines of code, we’ve got a pretty good feeling player ship that moves around the screen and fires bullets. Not bad!
View the source code for this section.
Defeating Enemies
A shmup without enemies is no shmup at all! Let’s spawn enemies that fly down the screen and when they’re hit by the player’s bullet, they lose health points (HP). When their HP drops to 0, they’ll disappear.
Start by defining the local variable hit_flash_time. It’s the time in
seconds that an enemy will flash then they’re hit by a bullet:
local hit_flash_time = 0.2 -- secs
Then define a new function that returns a new enemy table at a given position. This function makes it easy to keep all of the different of an enemy close together.
function init_enemy(x, y)
  return {
    x = x,
    y = y,
    hp = 12,
    w = 16,
    h = 16,
    speed = 44, -- px/s
    color = gfx.COLOR_RED,
    flash_timer = 0
  }
end
We’ll call this function soon. The returned table has the width (w) and height
(h), the color, the speed, and the flash_timer to keep track of changing
the enemy’s color when they’re hit. It’s worth noting that there’s a downside to
putting all of these values in a table like this: when our game code live
reloads, the State.enemies contains the old values, not the new ones until
either new enemies spawn or you press Ctrl + R to reload your game.
Since our game is so simple right now, that’s not a big deal. But it’s worth
seeing the difference in approach compared to using local variables we use the
different player properties. Later on this chapter, we’ll break up our code into
multiple files and revise how this is handled. But for now, reutnring the table
like this works.
We’ll store our enemies in a table in State, spawning three of them with our
new init_enemy function:
function _init()
  State = {
    player = {
      x = usagi.GAME_W / 2 - player_size / 2,
      y = usagi.GAME_H - 60,
      bullets = {}
    },
    enemies = {
      init_enemy(72, -20),
      init_enemy(usagi.GAME_W - 72, -20),
      init_enemy(usagi.GAME_W / 2, -60),
    },
  }
end
Then in _update, in our bullet loop, loop through each enemy and check if the
bullet overlaps with any of the enemies:
    -- check if the bullet has overlapped with any of the enemies
    for _, enemy in ipairs(State.enemies) do
      if util.rect_overlap(
            { x = bullet.x, y = bullet.y,
              w = player_bullet_w, h = player_bullet_h },
            enemy) then
        bullet.dead = true
        enemy.hp -= 1
        enemy.flash_timer = hit_flash_time
      end
    end

    -- remove bullets that have flown off the top of the screen
    if bullet.y < -player_bullet_h or bullet.dead then
      table.remove(State.player.bullets, i)
    end
util.rect_overlap is a function Usagi provides that checks if two rectangles
are intersecting. It returns true if they are. Each rectangle passed to this
function must be a table with an x, y, w, and h key and value. If they
do overlap, then we set the bullet’s dead property to true, reduce the
enemy’s hp, and set the enemy’s flash_timer to the local variable we
created earlier for how long to change the color when the enemy is hit.
Then, right after that, where we were checking for bullets that fly off the
screen, we also check if bullet.dead to see if we should remove dead bullets
as well. Just add or bullet.dead to the check that previously existed.
Now, similar to bullets and still in _update, we need to move our enemies down
the screen and remove them if they’ve run out of hp or fly off the screen:
  for i = #State.enemies, 1, -1 do
    local enemy = State.enemies[i]

    enemy.y += enemy.speed * dt

    if enemy.flash_timer > 0 then
      enemy.flash_timer = enemy.flash_timer - dt
    end

    if enemy.hp <= 0 or enemy.y > usagi.GAME_H then
      table.remove(State.enemies, i)
    end
  end
We loop through in reverse, just like bullets. And we set enemy.flash_timer to
the previous value minus dt, reducing that timer. We’ll check that in the
_draw code to know which color to draw the enemy.
When we defeat all of our enemies, let’s spawn some more, at the end of our
_update function:
  if #State.enemies == 0 then
    table.insert(
      State.enemies,
      init_enemy(72, -20)
    )
    table.insert(
      State.enemies,
      init_enemy(usagi.GAME_W - 72, -20)
    )
    table.insert(
      State.enemies,
      init_enemy(usagi.GAME_W / 2, -60)
    )
  end
There’s nothing too fancy here. We check if the number of enemies is 0 and
spawn more if so.
In _draw, after we draw our player rectangle but before we draw bullets,
we’ll loop through each enemy and draw them, factoring in whether or not their
flash_timer is greater than 0. If it is, then we’ll draw the enemy as pink
instead of the red that we set in init_enemy:
  for _, enemy in ipairs(State.enemies) do
    local color = enemy.color
    if enemy.flash_timer > 0 then
      color = gfx.COLOR_PINK
    end
    gfx.rect_fill(enemy.x, enemy.y, enemy.w, enemy.h, color)
  end
Our game is starting to have glimmers of being fun with enemies endlessly approach and bullets we can hit them with.
Enemy Bullets - Aimed Shots
Our game is a bit easy though. Sure, we could make the enemies move faster or spawn more of them. But the best way to add challenge (and fun) is to make the enemies fire back. In shoot ’em ups, there are two broad categories of enemy shot types: aimed shots that move toward the player’s position and shots that move in a specific pattern, regardless of the player’s location. We’ll focus on aimed shots in this section, making our enemies fire bullets toward the player’s position at the time of fire. This allows the player to dodge them by always needing to stay in motion. This is slightly different than a homing shot, which would follow the player where they move, requiring them to either shoot the missle down or somehow shake it off (homing shots would be a cool thing for you to add once this chapter is over!).
We’ll make our enemy bullets quite large compared to the player’s. Add a new variable at the top of the file for representing the width and height of the enemy bullets:
local enemy_bullet_size = 12
Add two new properties to our returned enemy table in init_enemy() that we can
use to track when a enemy should fire a bullet:
    fire_timer = 1.5, -- seconds until first shot
    fire_delay = 0.4, -- seconds between shots
    shots_fired = 0,
    shots_limit = 3,
fire_timer will be used to countdown 1.5 seconds and then have the enemy fire
their first bullet. We’ll reset fire_timer after each shot to fire_delay,
which will set the delay of future shots to 0.2s. We’ll use shots_fired to
count how many times the enemy has spat out a bullet and stop firing once that
number reaches shots_limit.
In the _init function’s State table, add a new key: enemy_bullets that’s
initialized to an empty table: {}:
enemy_bullets = {},
We’ll keep track of enemy bullets separate from each enemy so that even after an enemy dies or flies of their screen, their bullets live on, carrying out their mission to destroy us.
We need to make it so that our enemies fire bullets in our _update function
within the enemies loop. We’ll be calculating the linear velocity of the bullet
based on the angle of the enemy toward the player. We’ll use the power of
trigonometry to accomplish this! Right after the code where we handle updating
the enemy’s flash timer, add this:
    enemy.fire_timer -= dt
    if enemy.fire_timer <= 0 and enemy.shots_fired < enemy.shots_limit then
      local ex = enemy.x + enemy.w / 2 - enemy_bullet_size / 2
      local ey = enemy.y + enemy.h

      -- bullet center positions
      local bcx = ex + enemy_bullet_size / 2
      local bcy = ey + enemy_bullet_size / 2

      local angle = math.atan(
        (State.player.y + player_size / 2) - bcy,
        (State.player.x + player_size / 2) - bcx
      )

      table.insert(State.enemy_bullets,
        {
          x = ex,
          y = ey,
          angle = angle,
        })
      enemy.shots_fired += 1
      enemy.fire_timer = enemy.fire_delay
    end
There’s a lot here. Let’s break it down and go over what’s happening.
We subtract dt from the enemy’s fire_timer so that it counts down, just like
our other timers. Then, if the fire_timer is less than or equal to 0 and
the number of shots fired is less than the limit, we insert a new bullet into
State.enemy_bullets. In order to properly aim the bullet at the player, we
need to calculate the angle at which the bullet needs to travel based on the
enemy that’s firing the bullet’s position and the player’s position at the time
of fire. This is calculated using the arctangent of the y position delta and x
position delta. Then we increment the enemy’s shots_fired and reset the
fire_timer for future checks as to whether or not the enemy should fire
another bullet.
If you’re curious about the deeper trigonometric aspects of the arctangent calculate, check out the Wikipedia page on Inverse trigonometric functions. If you’re not curious, just accept that’s how aimed shots work and move on. For what it’s worth, these aspects of math in game programming make my head spin still (maybe a sign I should study it more!).
Right below the enemy loop in _update, in a new loop, we need to loop through
each enemy bullet, update its position, check for overlap with the player, and
remove any bullets that are dead or offscreen:
  for i = #State.enemy_bullets, 1, -1 do
    local bullet = State.enemy_bullets[i]
    local speed = 120
    bullet.x += math.cos(bullet.angle) * speed * dt
    bullet.y += math.sin(bullet.angle) * speed * dt

    if util.rect_overlap(
          { x = bullet.x, y = bullet.y, w = enemy_bullet_size, h = enemy_bullet_size },
          { x = State.player.x, y = State.player.y, w = player_size, h = player_size }
        ) then
      bullet.dead = true
    end

    if bullet.y > usagi.GAME_H or bullet.dead then
      table.remove(State.enemy_bullets, i)
    end
  end
We need to take the bullet.angle into account when we move the bullet. In
order to calculate the linear velocity, we pass that bullet.angle into
math.cos for the x velocity and math.sin for the y velocity, multiplying
it by enemy bullet’s speed and dt.
We then check if the bullet’s rectangle overlaps the player’s rectangle. If so, the bullet is dead. (And in the future, the player will die too.)
At the end of the enemy bullet update loop, we remove any dead bullets or those that are off screen.
Finally, loop through and draw each of the State.enemy_bullets after we draw
the player bullets:
  for _, bullet in ipairs(State.enemy_bullets) do
    gfx.rect_fill(bullet.x, bullet.y,
      enemy_bullet_size, enemy_bullet_size, gfx.COLOR_BLUE)
  end
There’s nothing particularly special about this code, we draw a blue square to represent the enemy bullets.
The Usagi _draw loop draws in order of the gfx calls. Each proceeding gfx
call draws on top of the previous ones. In shmups, it’s absolutely vital
that enemies and bullets are visible. So we draw the enemy bullets last, on top
of everything else.
Enemy bullet firing is one of the more complex parts of our shmup. Now that we’ve cleared that hurdle, we’ll be making some smaller changes to make our game more challenging and fun.
Tune some of the different values in the code to see what feels good, like try changing the bullet size, the fire delay, how many shots get fired. When making games, once you have the systems in place, you can turn the knobs and see what happens, which can often lead to some delightful surprises in your game’s design.
View the source code for this section.
Hitboxes
TODO: explain how we’ll have a player hit box smaller than the player, draw it; why we do this
Refactoring Our Code
TODO:
- Explain what refactoring is
- Break up the code into multiple functions
- Making enemy and player bullet updating code shared
- Using angular velocity
- rectangle functions for enemyes, bullets, player; DRY up that code
Game Over
TODO: when player is hit by a bullet, show game over and don’t update any longer
Waves of Enemies
TODO: build a table of enemies and have them spawn one after the other
Time Out
TODO: counting down time that remains from 60s
Scoring
TODO: killing enemies faster leads to higher score
High Score Tracking
TODO: saving it, displaying it, loading it
Sound Effects
TODO: explain how to make sfx and play them back in the game; player shot, enemy hit, enemy explosion, player death; using pitch variation and tweaking volume a bit
Sharing Our Game
Bonus Credits
TODO: list out ways to expand upon the shmup; ideas: bombs, music, sprites, explosion effects, adding homing shots/missles; player lives
Possible Future Expansions
- Sprites - I’m on the fence if I want to introduce that here or in a future game, like Sokoban or the action platformer
- Starfield
- More enemy types
- More bullet patterns, like spirals
Snake
TODO: cover how to code snake
Sokoban
TODO: cover how to code a Sokoban game
Intro to Sokoban
TODO: explain what Sokoban is
Moving Around the Grid
TODO
Designing Levels
TODO
Win State & Reset
TODO
Level Select
TODO
Bonus Credits
- Keep track of the number of steps taken and show them on the screen
- Implement undo!
- TODO: add more
Action Platformer
TODO: basically going over how to code something like Contra or Kero Blaster with a couple of levels, a camera, enemies.
Outline:
- Moveable player
- Firing
- Basic enemy
- Level - basic
- More advanced enemy
- Jumping & gravity & collision detection
- Level - advanced w/ a tool
- Level select & ancillary aspects
JRPG
TODO: coding a simple JRPG with Tiled for maps; based on https://github.com/brettchalupa/1_bit_fantasy and the Playdate book Dungeon Crawler chapter; can use a Kenney tileset pretty nicely/easily
Dev Mode Functionality
TODO: write this recipe; outline:
- intro to
usagi.IS_DEVand why it’s so useful; showing some examples from my games - hitbox overlay
- invincibility toggle
- quickly jump places
- embed the video I made
Making Dev Tools
TODO: cover how you can make dev tools for your games with Usagi, each in their
own folders or single lua files and run with usagi dev or usagi run, things
like level editors or data browsers or whatever else might be useful; sharing
NEOGEAR’s caravan tool as an example
Advanced State
TODO: cover how to use State global to allow for live reloading of all the
non-state code when there are changes and not lose what you’ve got; gotchas with
this; etc.
Advanced Data
TODO: covering how to use the ./data dir to do things like localization, game
data loading, metadata parseable by other languages like Ruby for itch deploy
script; etc.
Level Editors
TODO: cover how to use Usagi Engine with common level editing tools
LDtk
https://ldtk.io
JSON export; how it works with live reload too
Tiled
Export as Lua;
Collision Detection
TODO: cover how to do different and simple collision detection with the util
functions
Packing Sprites
TODO: cover some workarounds/techniques for working with single sprites.png but having separate files; you could use Texture Packer which has a GUI and CLI or their free web version; also you could just copy and paste them in
Usagi Versus X
Picking what game engine to use is a big choice! There are lots of options out there, all with their own pros and cons. In this recipe, I’ll go over what the differences are compared to Usagi Engine to hopefully help you decide. I’ve only included ones I’ve used, and this recipe is primarily focused on tools of similar scope (2D games for PC and web).
My comparisons attempt to be as objective as possible based on my experience. I’ve been making games for over 20 years, and I don’t benefit financially from you using Usagi Engine, so I really have no ulterior motive. There are many times when using an engine other than Usagi is the right choice!
Usagi Versus Pico-8 & Picotron
Pico-8 and Picotron are fantasy consoles made by Lexaloffle that include fully-featured sprite, map, and sound editors. Games are coded in Lua, just like Usagi. Pico-8 and Picotron are major influences on Usagi Engine. They export their games to PC and web, which is great.
You should use Pico-8 or Picotron if you:
- Value having robust tools built into the engine.
- Want to be part of a community using and sharing games using that technology, as they both have excellent communities.
You should use Usagi Engine instead if you:
- Prefer free and open source software, as Pico-8 and Picotron are closed source.
- Want your game to automatically update when you change your code and assets.
- Don’t want to worry about token limits.
- Prefer using a standalone sprite editor and using sound effects and music in common formats that you made or have permission to use.
- Want a bit more flexibility and power.
- Need to be able to change the underlying aspects of the engine.
I built Usagi Engine and use it instead of these tools because of those reasons. The live reload in particular is fantastic. I love that Pico-8 and Picotron exist and are incredible tools.
Usagi Versus Pyxel
Pyxel is a kind-of-sort-of fantasy console where you code games with Python. It’s less integrated than Pico-8 and Picotron, as you bring your own code editor. But it does have more robust tools than Usagi. Pyxel is also free and open source.
You should use Pyxel if you:
- Want to code your games in Python.
- Want more tools than what
usagi toolsgives you.
You should use Usagi Engine instead if you:
- Want to use Lua to code your games.
- Want simpler cross-platform game export, as it’s a little bit more tricky with Pyxel for desktop exports.
Usagi Versus TIC-80
TIC-80 is a free and open source fantasy console, most similar to Pico-8. It supports a bunch of different languages: lua, ruby, js, moon, fennel, scheme, squirrel, wren, wasm, janet or python.
The same reasons to use Usagi over Pico-8 apply to TIC-80. Usagi has live reload and fewer constraints.
Usagi Versus Love2D
Love2D is a game programming library for Lua. It’s much more complex than Usagi and therefore much more powerful. It has some downsides though: it’s not as easy to export your game for web, Linux, macOS, and Windows like it is with Usagi. Also, live reload isn’t a built-in feature.
You should use Love2D if you:
- Want a much bigger API that lets you do pretty much everything you’d want to do in a 2D game.
- Want to make games for mobile devices.
- Want to code input bindings, pause menu, settings, save data, and more yourself.
You should use Usagi instead if you:
- Value the live reload and single-command export functionality.
- Don’t want to mess with Love.js to get web builds.
- Would like a smaller, simpler API that does most things 2D games do and are okay with some limitations.
In a lot of ways, I think if someone makes a robust prototype with Usagi and they want to expand it into a bigger commercial game, Love2D is a great fit. Porting from Usagi to Love2D is not difficult because of the shared language. And you’d then get a lot more power (but with a worse developer experience).
I hope to build out an Usagi -> Love2D shim in the future to make it as easy as possible to port an Usagi game to Love2D.
Usagi Versus Godot
Godot is an open source game engine for making 2D and 3D games. It’s mature, robust, and fully featured. It has its own scripting language called GDScript. Or you can use other languages with it via various toolchains, with C# being a popular one. Most people using Godot are making their games in the Godot Editor, which is a fully-featured graphical user interface. Godot is a great engine, but it’s a lot to dig into and learn. Usagi is much simpler, for better and worse. If you want to make a commercial game, Godot is likely a great fit! If you want to make simple 2D prototypes rapidly, both would work well. Godot features cross-platform export like Usagi does. But the web performance, at least the last time I used it, was quite poor.
You should use Godot if you:
- Want to make a 3D game.
- Want to use a tool with a large community and lots of resources.
- Have commercial aspirations from the get-go.
- Prefer all-in-one graphic user interfaces.
You should use Usagi instead if you:
- Want to code games in Lua instead of GDScript.
- Prefer having more control of your game loop.
- Want to learn coding.
- Prefer simpler tools.
- Prefer command-line interfaces.
Usagi Versus Defold
I haven’t used Defold, so I honestly have no idea how it compares!
Usagi Versus DragonRuby Game Toolkit
DragonRuby Game Toolkit is a commercial game engine for making 2D games with Ruby. It’s a key inspiration for Usagi. It’s closed source. It has a lot of similar ergonomics.
You should use DragonRuby Game Toolkit if you:
- Prefer Ruby over Lua.
- Want to target mobile platforms.
- Want a more powerful API.
You should use Usagi instead if you:
- Want to use a free and open source engine where you can modify the source.
- Prefer a simpler API and some constraints.
- Want to make lower resolution pixel art games.
Usagi Versus Raylib
Raylib is a game programming library in C with lots of bindings for other languages. Raylib supports 2D and 3D games. It’s also what powers Usagi Engine under the hood! Raylib is great, but it’s got a lot going on. Coding in C is also quite a bit more complex than Lua.
You should use Raylib if you:
- Want to completely own your game loop.
- Need more performance.
- Want to code your game in a lower level language like C, C#, Rust, etc.
- Want to code 3D games.
- Need a more powerful API.
You should use Usagi instead if you:
- Prefer simpler languages like Lua.
- Want live reload of code and art assets as you change them.
- Prefer a command-line driven workflow with cross-platform exports in a single command.
Usagi Versus MonoGame / FNA / LibGDX / Bevy / Karl2D / SDL / etc.
There are a lot of different open source 2D and 3D game engines and libraries out there. You can find one for most programming languages. Which you should use is very similar to the Raylib thoughts above. You’ll miss out on the simplicity and rapid prototyping speed of Usagi, but you gain much more power and flexibility.
How to Decide
It’s ultimately your decision! That’s part of what’s fun about making games. There’s no single best choice or an engine that does everything for everyone. You could go and spend a few months or years evaluating all of the options. That’s fun in and of itself and you’ll learn a lot. But if you want to focus on making games and growing as a developer, I’d pick one or two and get really comfortable with using it. Much like if you buy some tools for home improvement. There are so many tools out there, but once you find the ones that feel great in your hand and you know how to use, you can get to work on improvements instead of constantly evaluating tools. The same applies to games. Your time is better spent learning a tool deeply and growing as a game developer rather than surface level hopping around engines.
My toolkit and thinking is quite simple:
- For small 2D games (like in a game jam or something I make over a couple of weeks), I use Usagi Engine. It’s perfect for this.
- For larger games, if I wanted to stay in Lua, I’d use Love2D. But I honestly would prefer to not use Lua for larger games because after 15 years of coding Ruby in large codebases, I’d much prefer to use a statically typed language for anything remotely complex. Large codebases that are pure scripting languages are a nightmare to work in and change without excessive automated tests.
- So, for larger games, I’d use sola-raylib, the Rust bindings for Raylib, that I maintain. That way I have full control, better tooling, a compiler, a linter, and the ability to use Lua if I want in various places.
User Install vs Project Executable
The default way of installing Usagi is to run the install script that makes the
usagi command available across your computer’s user. That way from any folder,
you can run usagi to interact with the engine. This is convenient for a few
reasons:
- It’s easy to update the engine when there are bug fixes and new features, you
just run
usagi updateonce. - If you use multiple operating systems, you install Usagi for each system and run the same command and it works without having to worry about the macOS executable vs the Linux executable.
- When you’re creating new projects with
usagi init, the command is available no matter where you want to put your project.
But there are some downsides to be aware of with user installs of Usagi. Let’s
say you make a game with Usagi v1. And then 5 years later, there’s Usagi v2 that
comes out and some of the functions change. If you did usagi update and then
ran your game, your game might have errors that you need to fix, which could be
tedious. I don’t know what the future of Usagi will bring, so if you want to
make sure your projects are resilient to changes in the engine, you can download
the Usagi version that corresponds to your project and put the usagi
executable in your project’s folder.
Also, if you have many Usagi projects and they rely upon different versions of the game engine, it can be useful to put the version you used for that game in your project’s folder.
All historical downloads of Usagi from v1.0.0 and onward are available at
https://codeberg.org/brettchalupa/usagi/releases.
If you made your game with Usagi v1.1.1, you’d find that release and download
it. Decompress the archive and put the usagi (or usagi.exe) in your
project’s folder. Then you’d run commands by referencing it locally, like
./usagi dev on Linux and macOS or .\usagi.exe dev on Windows. The ./ and
.\ prefixes say: use the local, project executable instead of the usagi
installed on the system. It’s referencing the file path.
Using a project executable is ideal if you’re only going to develop your games on a single operating system. Otherwise you’ll run into issues trying to use the macOS executable on Linux.
It’s ultimately your decision for how you want to install and interact with
usagi. In summary, install Usagi for your user if you value easily and quickly
accessing it. If you want the same Usagi version you made your game with to be
present years down the line, put the usagi executable in your project’s
folder.
If you use usagi init for your projects, look at the top of USAGI.md to see
the version:
<!-- Generated by usagi 1.1.1. Run `usagi refresh` to update. -->
That can be an easy hint to see which version was used at the time of
usagi init or usagi refresh.
Coming from Pico-8
Usagi’s API is heavily inspired by Pico-8’s. The core idea behind the creation of Usagi Engine was: what if Pico-8 had live reload and a little bit more functionality?
While the APIs are similar, they’re not exactly the same. Usagi plays audio files rather than having an editor and music tracker. Usagi doesn’t have a camera or map helpers.
The main reasons to use Usagi instead of Pico-8 (or even Picotron) is that Usagi has live reload of your code and assets. As you change them, they automatically update in your game. This leads to ultra fast iteration speeds, which is essential for game dev.
Pico-8 Shim Example
If you want to use Usagi with functions that are as close to Pico-8’s as possible, look at the Pico-8 example.
You’d drop in
pico8.lua
into your project and require "pico8". This lets you write Usagi games with an
API like this:
function _update(dt)
  if btn(0) then
    State.p.x = State.p.x - State.p.spd * dt
    State.p.face_left = true
  end
  if btn(1) then
    State.p.x = State.p.x + State.p.spd * dt
    State.p.face_left = false
  end
  if btn(2) then
    State.p.y = State.p.y - State.p.spd * dt
  end
  if btn(3) then
    State.p.y = State.p.y + State.p.spd * dt
  end
  if btnp(4) then
    State.count += 1
  end
end

function _draw(_dt)
  cls(1)

  rectfill(0, 0, usagi.GAME_W - 1, 13, 0)
  line(0, 14, usagi.GAME_W - 1, 14, 5)
  print("pico-8 flavor", 2, 1, 15)
  print("count: " .. State.count, 200, 1, 10)
end
The Pico-8 shim is not 100% of Pico-8’s functions, as Usagi has differing
functionality at some points. The way music is played differs. Usagi has no
camera. It’s all documented at the top of pico8.lua.
The shim is meant more for comfort, not for having it be extremely easy to port your Pico-8 game to Usagi. But if you did want to do that, it wouldn’t be too difficult of a port dependent on what your game utilizes.
Exporting Pico-8 Assets
Pico-8 makes it easy for you to get your spritesheets, music, and sound effects exported into a common format that other programs can use. What’s nice is that these files work really well with Usagi.
Export sprites.png
In Pico-8, run this command:
export sprites.png
Then you can use:
folder
to find your new sprites.png file. You can copy or move it into your Usagi
game project.
Pico-8’s spritesheet is 8px by 8px by default. So in your Usagi main.lua,
update your _config() function to set the sprite_size accordingly:
function _config()
  return { sprite_size = 8 } -- other options omitted
end
Alternatively, if you want your sprites larger or want to stick to Usagi’s
default 16px by 16px size, you could double the size of your sprites.png in an
image editor.
Export Music
In Pico-8, open the music editor and press Esc. Then run this command:
export music_%d.wav
Use folder to open them in your operating system’s file explorer. And then
copy them into your Usagi game’s music directory. It exports all tracks. Now
you can play those sound effects with music.loop("music_1"), etc.
Export Sound Effects
In Pico-8, open the sound effect editor and press Esc. Then run this command:
export sfx_%d.wav
Use folder to open them in your operating system’s file explorer. And then
copy them into your Usagi game’s sfx directory. It exports all 64 sound effect
slots. You can delete the ones that don’t play any sound. Now you can play those
sound effects with sfx.play("sfx_1"), etc.
Porting to Love2D
Usagi makes it easy to port your game to Love2D, another Lua game programming engine/toolkit/framework. This is desirable if you build a fun prototype with Usagi but then you want to expand the game’s capabilities and platforms. For example, if you made a game you want to run on iOS and Android. Or integrate with Steam. Or have multiplayer support. The sky’s the limit with Love2D!
Usagi comes with a command to make this as easy as possible: usagi loveify
usagi loveify sets up your game to run in Love2D by outputting a shim to
translate Usagi function calls to use Love2D’s API. It also expands some of the
compound assignment operators that Love2D does not support. After you run that
command, you’ll end up with a Love game you can run.
If you have an Usagi game in the mygame folder, you’d run:
usagi loveify mygame mygame_love. The ./mygame_love folder will contain your
game converted to Love2D. Then run love mygame_love to boot the Love2D
version.
usagi loveify is intended to be done once when you want to move your project
from Usagi to Love2D. It comes with some constraints and limitations: there’s no
Pause menu, no input mapping, and some APIs don’t work. Live reload and
cross-platform export aren’t nearly as easy either with Love2D. You lose some of
the niceties of Usagi but gain lots of power. This might be a good tradeoff for
you and your game!
Read the full details on the usagi loveify command and shim:
https://codeberg.org/brettchalupa/usagi/src/branch/main/examples/loveify#usagi-loveify-shim
In summary, usagi loveify is a good fit if you want:
- To integrate with Steam
- Release your game on iOS and Android
- Integrate networking
- More advanced rendering and input functionality
Resources
A collection of external resources beyond the book to assist with game development, Usagi, and Lua.
Usagi Resources
If there are ever blog posts and videos about how to use Usagi, let’s link them here!
Game Programming Resources
- Game Programming Patterns — a great book by Robert Nystrom about architecting and organizing non-trivial game codebases
- Code the Classics — a free book covering how to make classic games in PyGame, but you could adapt them to use Lua and Usagi!
- Jeffrey Thompson’s Collision Detection Guide — in-depth explanations of collision detection
- Easing Functions — explainers for different types of easing, useful for animation and juice
Lua Resources
- Learn Lua in Y Minutes — a concise overview of the language, ideal for those experienced with programming but new to Lua
- Lua 5.5 Reference Manual — an in-depth guide to the Lua programming language that Usagi uses
Game Development Resources
Making games is fun but difficult! Here are some blog posts, guides, and more that can help you when thinking about making games just beyond the coding.
- How to Make a Video Game All By Yourself — a concise and enjoyable guide to solo indie dev by Matt Hackett
- Make Games with Derek — thoughtful blog posts on game development from Derek Yu, the creator of Spelunky and other great games
Videos
A selection of the best videos about making games:
- “Juice it or lose it” presentation — how to polish games
- “The art of screenshake” presentation — a step-by-step guide on making a game feel good to play
- “Game a Week: Teaching Students to Prototype” presentation — two college instructors talk about their courses where students make a game a week
Tools
Recommended tools for making games. Most of which are free.
Audio
- jsfxr — generate retro sound effects in your browser
- ChipTone — another sound effect tool
- Audacity — audio editor
- 1BitDragon — intuitive music creation software
- LMMS — music creation tool
Graphics
- Aseprite — pixel art tool
- PixiEditor — multi-purpose 2D graphics editor
- LibreSprite — free pixel art tool, fork of Aseprite
- GIMP — open-source image editor
- Inkscape — open-source vector editor
- Krita — digital painting tool
- Piskel — free browser pixel tool
- YAL’s Pixel Font Converter — make pixel fonts in your browser
Assets
Making a game by yourself can seem like a lot when you need to design the game, code it, make the art, create music, and then release it. Luckily there are lots of generous game devs out there who share their assets, from music to sound effects to sprites to 3D models. Whether you’re rapidly prototyping and will redo the art later or don’t want to deal with it at all, you might be surprised at the great assets out there.
- OpenGameArt.org
- Assets on Itch
- Kenney
- DaFont — font downloads
- Google Fonts — free fonts
License
The prose of this book is public domain.
The source code in this book is public domain. Full details:
This is free and unencumbered software released into the public domain.
Anyone is free to copy, modify, publish, use, compile, sell, or distribute this software, either in source code form or as a compiled binary, for any purpose, commercial or non-commercial, and by any means.
In jurisdictions that recognize copyright laws, the author or authors of this software dedicate any and all copyright interest in the software to the public domain. We make this dedication for the benefit of the public at large and to the detriment of our heirs and successors. We intend this dedication to be an overt act of relinquishment in perpetuity of all present and future rights to this software under copyright law.
THE SOFTWARE IS PROVIDED “AS IS”, WITHOUT WARRANTY OF ANY KIND, EXPRESS OR IMPLIED, INCLUDING BUT NOT LIMITED TO THE WARRANTIES OF MERCHANTABILITY, FITNESS FOR A PARTICULAR PURPOSE AND NONINFRINGEMENT. IN NO EVENT SHALL THE AUTHORS BE LIABLE FOR ANY CLAIM, DAMAGES OR OTHER LIABILITY, WHETHER IN AN ACTION OF CONTRACT, TORT OR OTHERWISE, ARISING FROM, OUT OF OR IN CONNECTION WITH THE SOFTWARE OR THE USE OR OTHER DEALINGS IN THE SOFTWARE.
For more information, please refer to https://unlicense.org/